Showing posts with label Collage. Show all posts

Thursday, February 14, 2019

Live....love...laugh ...Home Decor Panel


Live....love...laugh ...Home Decor Panel

Hi Friends

Sharing another mixed media canvas with all of you using Craft Cement from Little Birdie and color supplies from DecoArt Media

I used Cheese Cloth  and  Craft Cement and a face mold to create my composition.........

Live....love...laugh ...Home Decor Panel

Live....love...laugh ...Home Decor Panel

leave it overnight or for 24 hours to dry completely. I used Stencils and DecoArt Modeling paste to create sun ray and stone wall textures on the MDF square board of size 8"x8". Adhered the focal element made with craft cement and Gauze with DecoArt Heavy Gel Medium and then used DecoArt  Black Gesso to cover all......

Live....love...laugh ...Home Decor Panel

let dry and colored with DecoArt Neon Fluid Acrylics 
Live....love...laugh ...Home Decor Panel
Fiery Red and Torrid Orange DecoArt Americana Neon Acrylics............
Live....love...laugh ...Home Decor Panel
Cobalt Teal Hue , Cobalt Turquoise Hue and Blue-Green Light Decoart Media Fluid Acrylics .....
Live....love...laugh ...Home Decor Panel

Live....love...laugh ...Home Decor Panel
DecoArt Media Fluid acrylics in Interference Violet , Interference Blue and Interference magenta .Media Interference Fluid Acrylics include six translucent colors that shift in color and appearance depending upon the light, viewing angle and color of the surface on which they are applied.
When applied over a dark color you will see more opalescent color and less of the color shift. When applied over a light color you will see a sheer opalescent color but more of the color shift. Thin applications in a wash or glaze increase the visual interference effects......
Live....love...laugh ...Home Decor Panel
I have highlighted all the textures with DecoArt Metallic Lustre in Burnished Brass,Gold , copper and turquoise  which is a water based metallic wax that buffs to a brilliant shine......
Live....love...laugh ...Home Decor Panel


Live....love...laugh ...Home Decor Panel


Live....love...laugh ...Home Decor Panel

After all the layers were completely dry I coated the canvas with DecoArt Clear Pouring Topcoat. although this was used a a topcoat for paint pouring projects but I love the lacquer-like, high-gloss finish it provides. The Pouring topcoat is crystal clear, non tacky and self-leveling and does not yellow over time..............added some gems to finish off....


Live....love...laugh ...Home Decor Panel

I do hope you will like this ............
linking to
Mixed Media Academy- February-Challenge


Please do leave your comments. I would love to read what you say and I would love to visit your blog too !!

Friday, February 8, 2019

Montage.......


Montage....a Mixed Media canvas
Hi Friends

Sharing a mixed media canvas with all of you using Craft Cement from Little Birdie and color supplies from DecoArt Media

I started with coating the canvas with thick coats of  Little Birdie Mixed Media Paste in white and Slate , they prime the surface and also give great texture.......
Montage....a Mixed Media canvas
I then used Cheese Cloth  , Craft Cement and some face molds to create my composition.........
Montage....a Mixed Media canvas
Added water to the craft cement and dipped the cheese cloth in cement mixture. shaped the cheese cloth and clay molded faces to create a flowing composition......


Montage....a Mixed Media canvas
leave it overnight or for 24 hours to dry completely, then use a matte black spray paint or Black Gesso to cover all......

Montage....a Mixed Media canvas
let dry and colored with DecoArt Media Fluid acrylics in Interference Violet , Interference Blue and Interference magenta .Media Interference Fluid Acrylics include six translucent colors that shift in color and appearance depending upon the light, viewing angle and color of the surface on which they are applied.

Montage....a Mixed Media canvas

Montage....a Mixed Media canvas

Montage....a Mixed Media canvas

When applied over a dark color you will see more opalescent color and less of the color shift. When applied over a light color you will see a sheer opalescent color but more of the color shift. Thin applications in a wash or glaze increase the visual interference effects......
Montage....a Mixed Media canvas
I have highlighted all the textures with DecoArt Metallic Lustre in Burnished Brass which is a water based metallic wax that buffs to a brilliant shine......
Montage....a Mixed Media canvas
After all the layers were completely dry I coated the canvas with DecoArt Clear Pouring Topcoat. although this was used a a topcoat for paint pouring projects but I love the lacquer-like, high-gloss finish it provides. The Pouring topcoat is crystal clear and self-leveling and does not yellow over time ..............
Montage....a Mixed Media canvas


Montage....a Mixed Media canvas

Montage....a Mixed Media canvas
I do hope you will like this ............
linking to 
Mixed Media Academy- February-Challenge

Please do leave your comments. I would love to read what you say and I would love to visit your blog too !!

Monday, October 29, 2018

Reverse Decoupage and Collage on Glass


Collage on Glass with DecoArt

Hi Friends
I would like to share this lovely collage work I created on a Glass Plate. This actually combines both the techniques of  Reverse Decoupage and Collage.

Collage on Glass with DecoArt

The painted Deer is a Decoupage napkin Tissue. I have cut out the image from the Napkin and removing the extra ply decoupaged the image with Americana Decou-Page Matte Decoupage Glue . Clean the back of the plate with an alcohol wipe and make sure it is dry. In the reverse decoupage technique, remember to keep the Tissue Image face down on the glass surface, apply the Decou-Page Matte and allow to get little tacky and then place the Tissue paper slowly and smooth with a plastic wrap. let dry and give another coat of Decou-Page Glue to seal the napkin.

Collage on Glass with DecoArt

After the Decou-Page Glue is dry, clean the glass with an alcohol or baby wipe or a damp rag to remove traces of extra glue. I have painted the Decoupaged image with DecoArt Media white Gesso  so that the Image design is highlighted. In the reverse decoupage technique if you are using Decoupage Napkin , it is very important to paint an opaque white layer  over the design so that the design is clearly visible . 

Collage on Glass with DecoArt

Next I have used a Book Print pattern paper from PaperMania , torn the paper into strips , dampened the strips of paper with water and then decoupaged onto the back of the plate with Americana Decou-Page Matte. Press with a damp sponge to ensure there are no air pockets.overlap the paper strips to cover the surface and let dry completely. Give another coat of glue and allow to dry completely. Cut the overhangs with sharp scissors or exacto knife. Distress edges with DecoArt Media Black Gesso.

I have given  one coat of DecoArt Matte Metallic gold on the back of the plate and one can see glints of gold in random places ( difficult to see in pics ) Finally two coats of DecoArt Media Ultra-Matte Varnish  to seal all the layers.

Collage on Glass with DecoArt

Do hope you like this combination of Decoupage and collage on the glass surface. Please do leave your comments. I would love to read what you say !!
DecoArt supplies used : 
DecoArt Media Gesso White and Black
Decou-Page Matte Glue and sealer
DecoArt Matte Metallics Gold
DecoArt Ultra-Matte Varnish

Tuesday, January 30, 2018

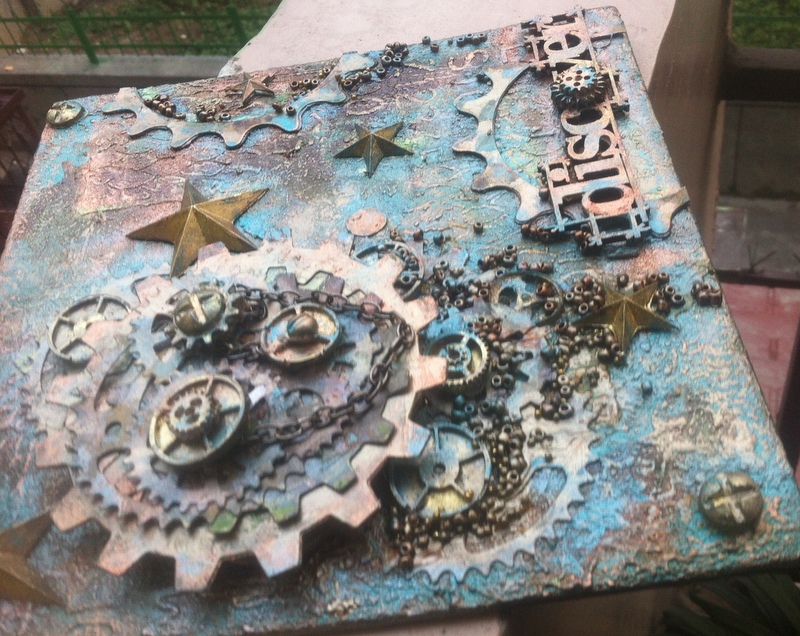
'Discover' .......a Collage/Assemblage Canvas

Hello Friends      
      
Today I am sharing a project using the Little Birdie's newly launched Mixed Media Paste. 
 
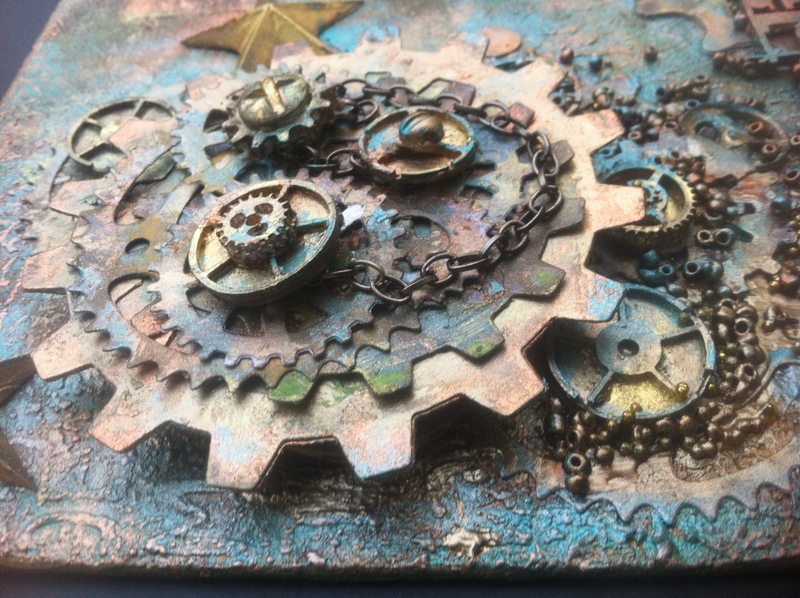
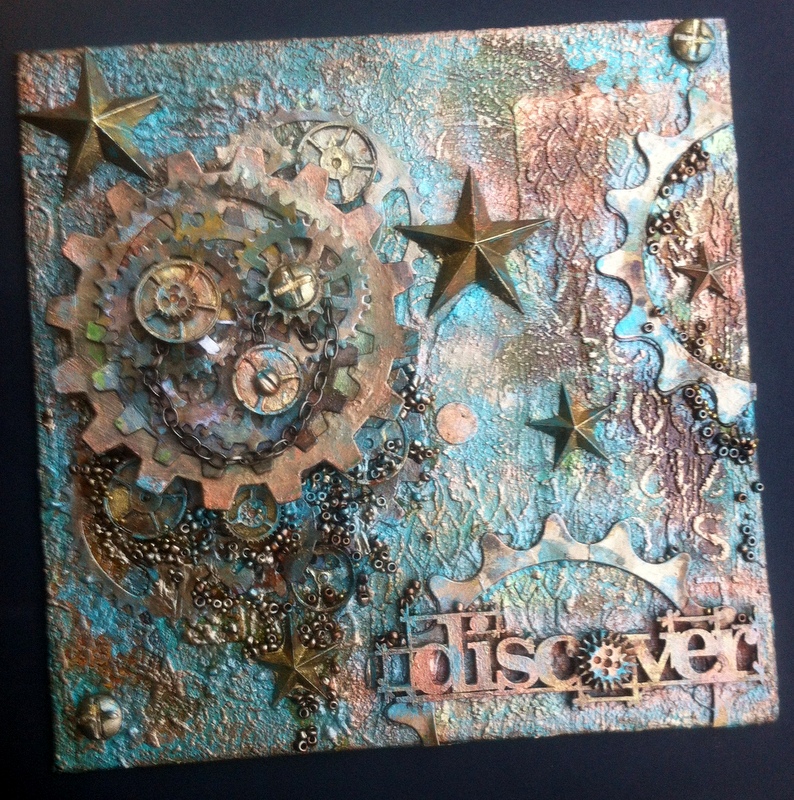
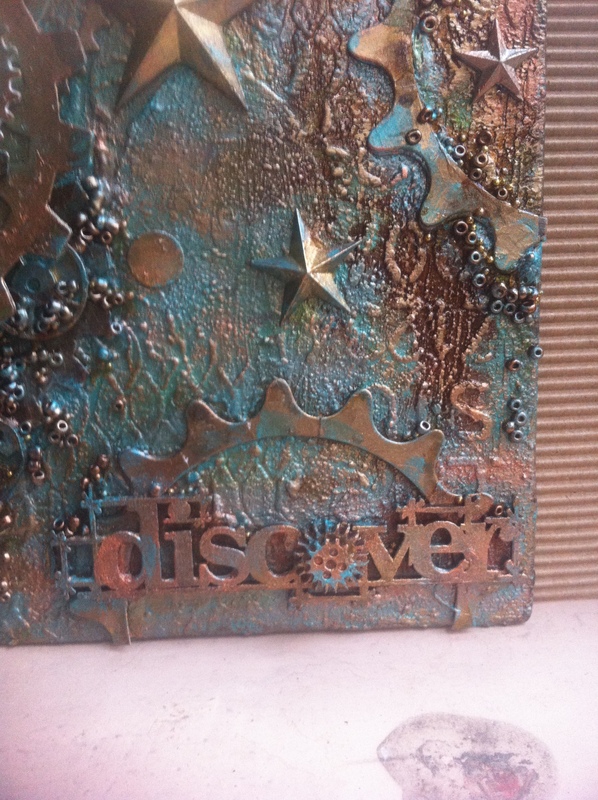
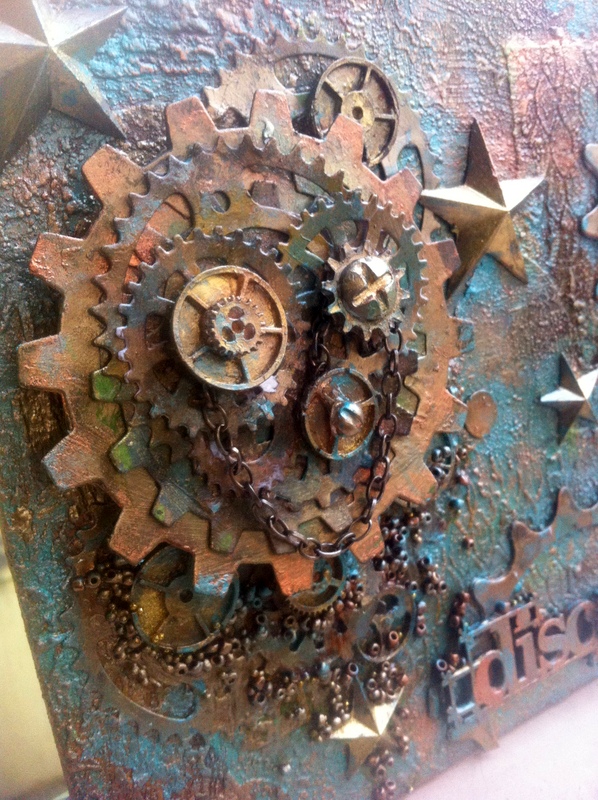
I hope you'll get inspired by my project using the Mixed Media paste.........a Collage/Assemblage work titled 'Discover' on a 8"x8" Canvas Board.......
 
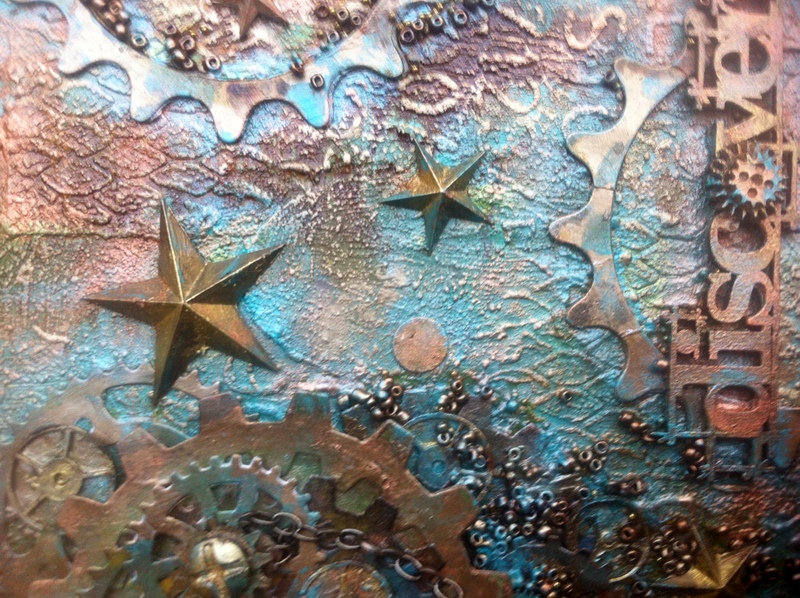
I gave my canvas an uneven coat of Mixed media paste with a credit card. It primed the canvas for further layers and also created gorgeous texture. After it dried , I created more texture with various stencils and this time used the Mixed Media paste as a modelling paste.......  
I created more texture by dry brushing with Mixed media paste after the stenciled surface dried ..... 

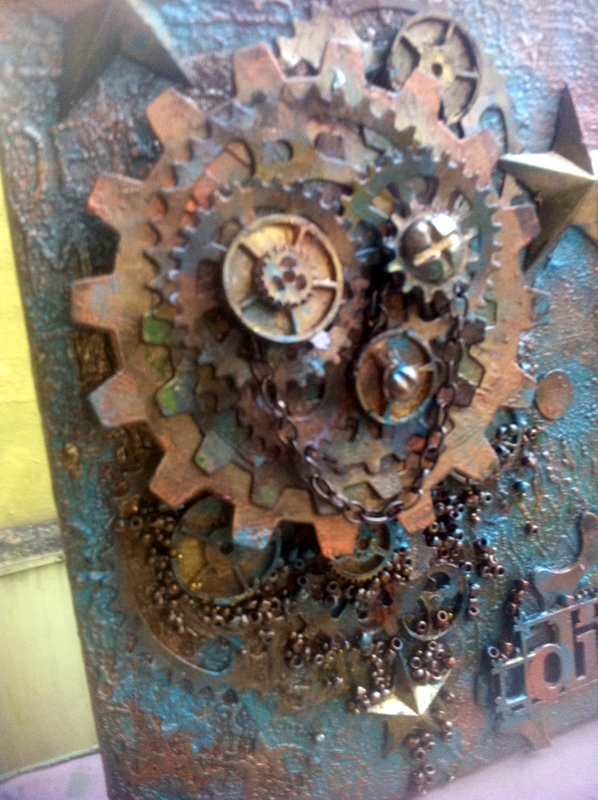
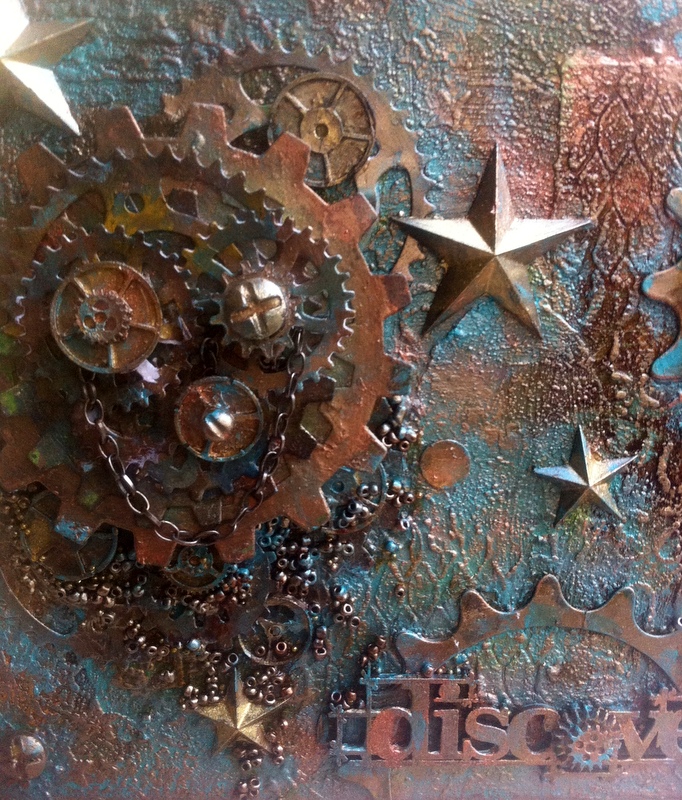
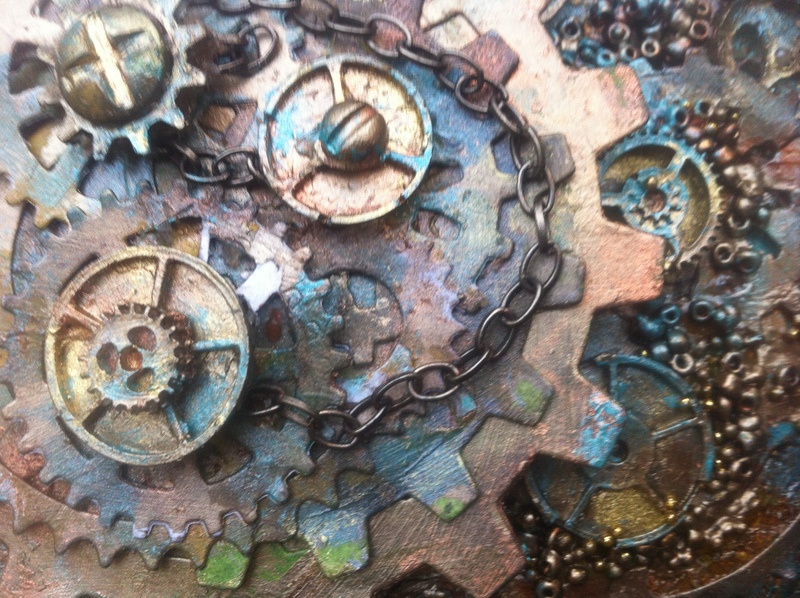
 I have used only paper die cut Gears using a spellbinder die set  and resin embellishments made using silicon molds and resin to create the composition. 

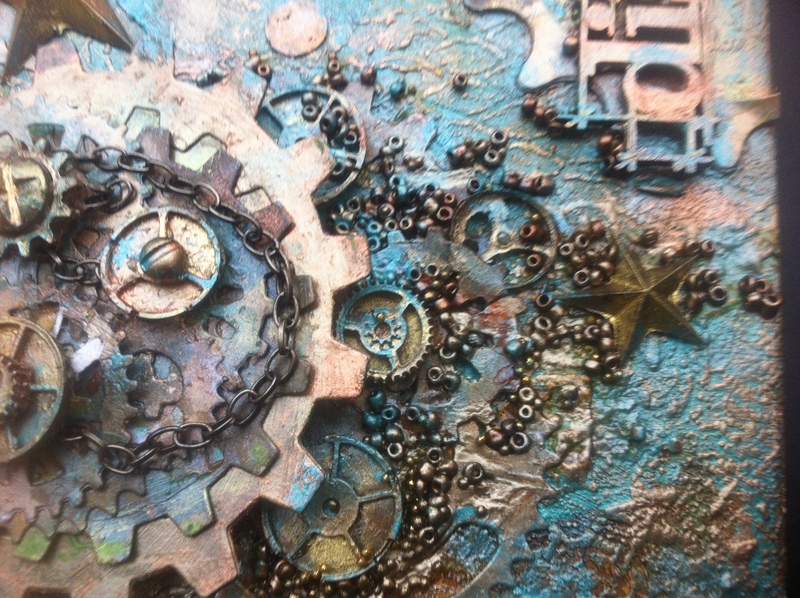
The sentiment Discover is a chipboard cutout. The stars, gears ,screws and bolts are all made of resin and silicon molds and the metal effect is using the acrylic metallic paints only. The die cuts have been layered where ever needed.  

All the embellishments and die cuts have been primed with Mixed media paste and then colored. I covered the whole panel with Caribbean Teal tinted metallic paint and then sprayed with alcohol splash in Gold Rush, Mocha and Marigold, Sprayed with Alcohol blending solution to make the colors move.  
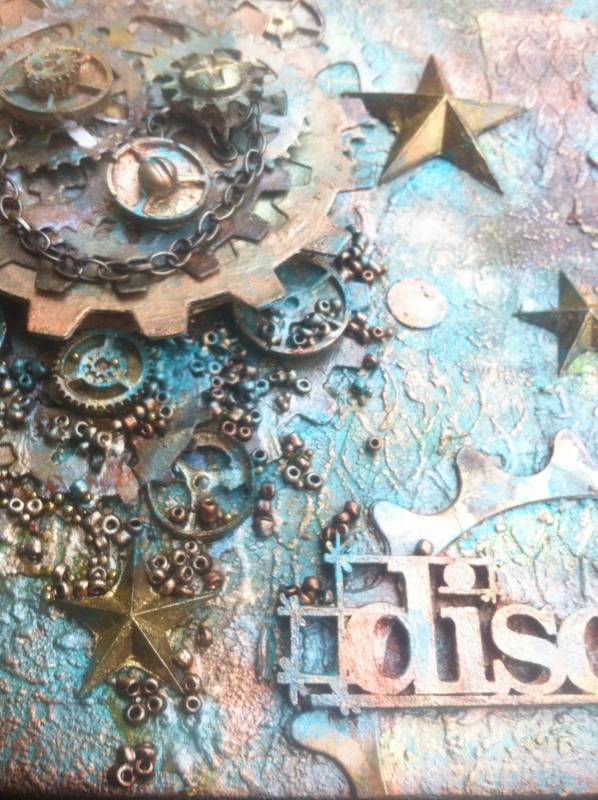
all embellishments , die cuts etc have got a coat of Mixed media paste and then coated with antique gold acrylic color and teal and green metallic paints........ 

small glass beads added with silicon glue ..........the only piece of Real metal on this canvas is the small piece of metal chain, rest all is paints and alcohol splash to give a beautiful rust and metal effect........
linking to :simonsaysstampblog.com/wednesdaychallenge/simon-says-layer it up
https://stamplorations.blogspot.in/2018/01/january-mixed-media-challenge.html#more
http://mixedmediaplace.blogspot.in/2018/01/january-challenge.html ........I was inspired by the lovely blue/green colors in the inspiration pic
http://www.happylittlestampers.com/2018/01/hls-january-anything-goes-with-dies.html
http://moremixedmediachallenge.blogspot.in/2018/01/more-mixed-media-challenge-anything.html
http://noordesign-uk.blogspot.in/2018/01/january-challenge-2018anything-goes.html


Please do leave your comments. I would love to read what you say and I would love to visit your blog too !!

Related Posts Plugin for WordPress, Blogger...

LinkWithin

Related Posts Plugin for WordPress, Blogger...